September 1, 2025

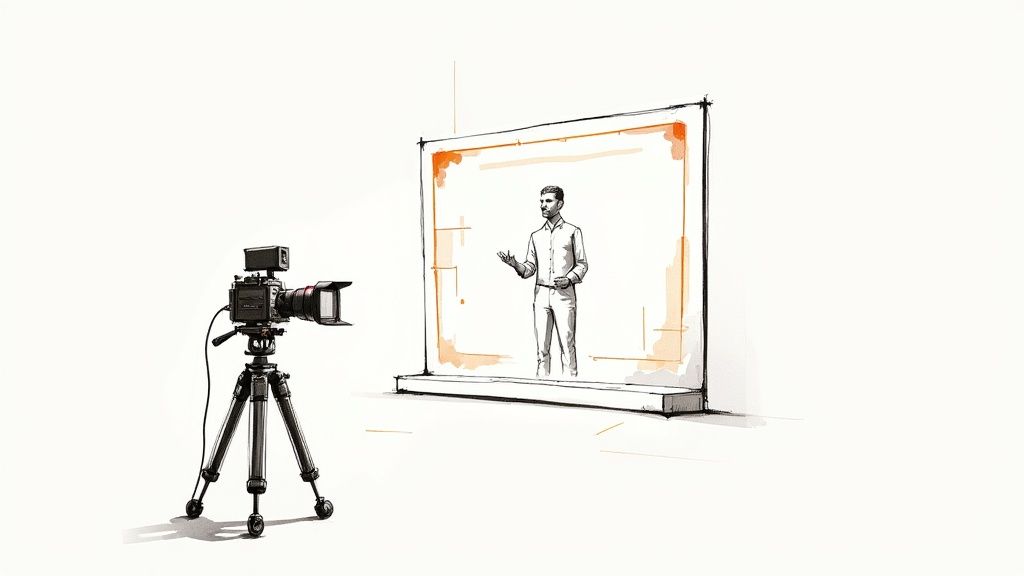
Making a great training video isn't about just pointing a camera and hitting record anymore. It’s a whole process—a journey, really—that takes a learning goal and turns it into something that actually sticks with people. We're talking about a full lifecycle here, from initial planning and scripting all the way through production, editing, and distribution. Get this right, and you create a powerful asset that delivers real, measurable results.
Let's be honest, for a long time, training videos were just a box to be checked. That's not the case anymore. Video has become the absolute engine of modern corporate training, largely because it's what people prefer and, frankly, what works. This whole shift to digital learning isn't just a fleeting trend; it's a massive economic reality.
The global market for eLearning video is exploding, thanks to better internet everywhere and companies finally embracing digital tools. In 2024, the online learning market was already valued at a staggering $314.03 billion. It's expected to jump to around $354.71 billion in 2025. And it's not slowing down—the eLearning video piece of that pie is projected to hit $625.3 billion by 2029. You can explore more insights about these eLearning video trends and see the numbers for yourself.
So, what’s the difference between a video that puts people to sleep and one that actually helps them learn? It all comes down to a deep understanding of the creation process and what makes learners tick. The best training videos are always built on a solid foundation of clear, well-defined objectives.
This is the exact process I follow to nail down training objectives before I even think about cameras or microphones.
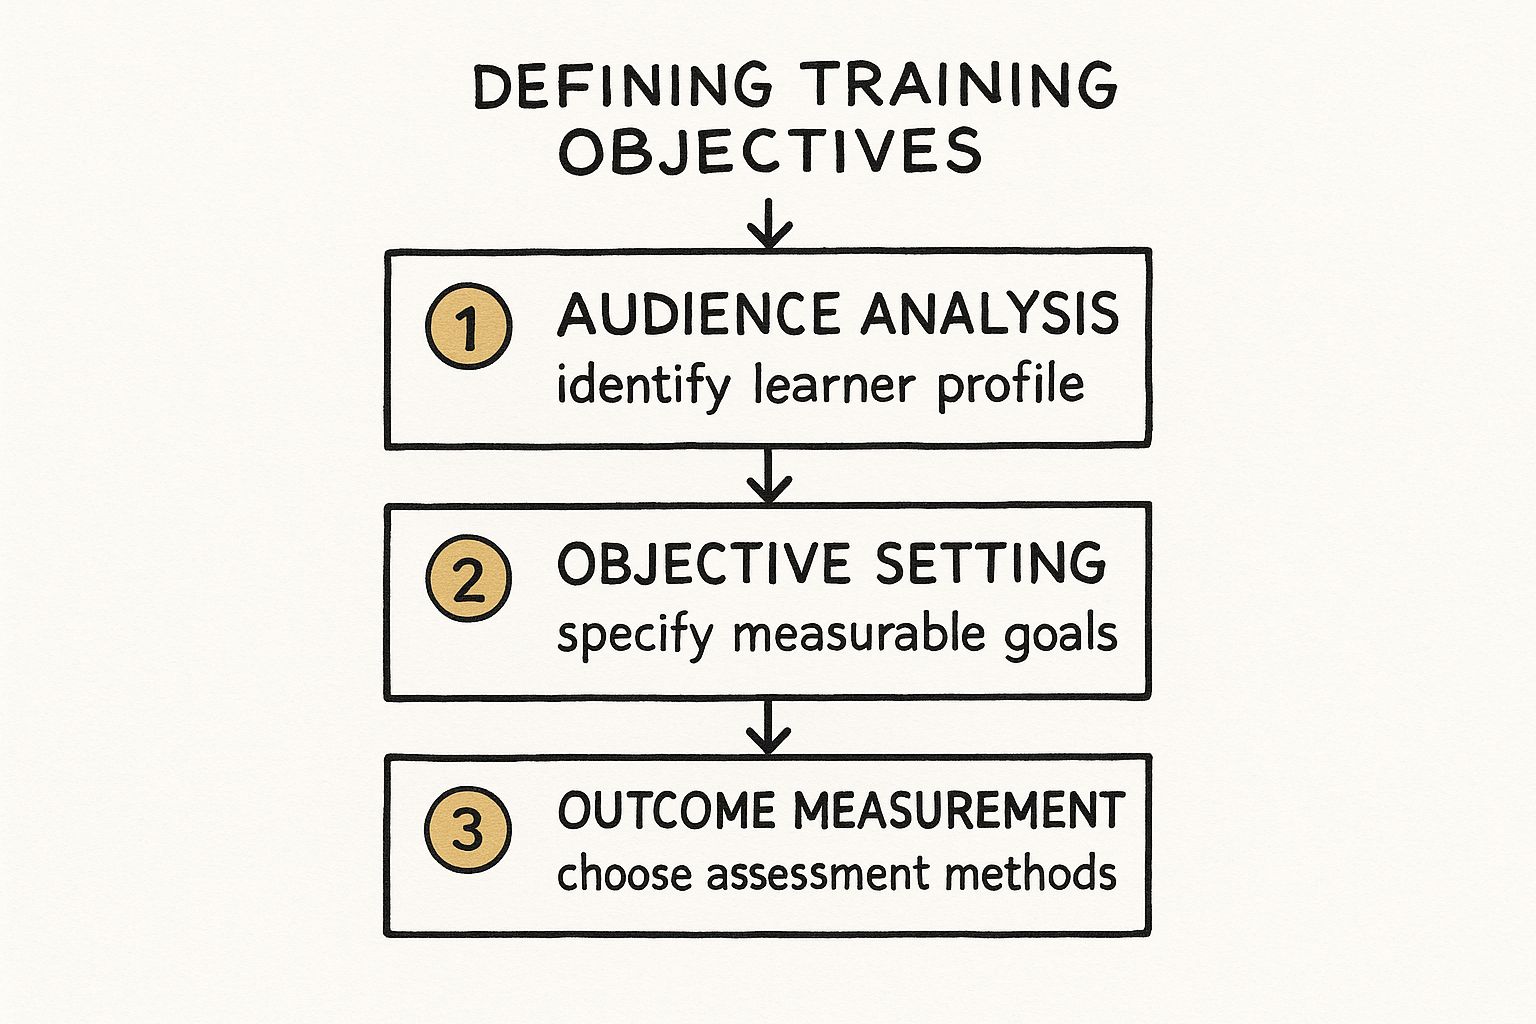
As you can see, success starts way before you hit record. It’s about knowing who you're teaching, what you need them to do differently, and how you'll know they got it. From my experience, rushing this early stage is the single biggest reason most training content falls flat.
The entire journey of training video creation follows a clear, logical path. Think of it as a roadmap that ensures every single element—every word, every shot—serves a specific purpose. In this guide, I'll walk you through each critical phase, giving you a practical framework for turning your raw ideas into truly impactful training.
To give you a bird's-eye view, here's a quick breakdown of the entire process.
Mastering each of these phases is what it takes to create training videos that don't just educate, but also inspire people to take action and drive real change in your organization.
This strategic approach is what separates content that just gets watched from content that actually gets results.
Anyone who’s made a great training video will tell you the real magic doesn’t happen in the editing suite—it happens long before you even press record. The pre-production stage is where you lay the groundwork, and honestly, skipping this step is the fastest way to create a video that nobody watches, that costs too much, or that completely misses the point.

Think of this as your game plan. It’s all about getting the hard questions answered upfront so that production and editing are just a matter of execution.
Before you even glance at a camera, ask yourself one simple but critical question: What should the viewer be able to do after watching this video? Trust me, vague goals like "understand the new software" are totally useless here.
You need learning objectives that are specific, measurable, and built around action. They give your video a clear purpose and let you know if you've actually succeeded.
When you have that level of clarity, it informs every decision you make, from what goes into the script to the final call to action. Your video stops being a passive "watch-me" and becomes an active training tool.
Right alongside your objectives is the need to truly understand your audience. The one-size-fits-all approach is a guaranteed recipe for glazed-over eyes and low engagement. Your tone, the complexity of the material, and the examples you use have to resonate with the people on the other side of the screen.
Ask yourself a few key questions:
Putting yourself in your audience’s shoes helps you create something that feels valuable and respects their time. That’s a huge factor in whether they actually remember what you taught them.
Once you know what you’re trying to achieve and who you’re talking to, you can get into the practical side of things. This doesn’t mean you need a Hollywood-level budget, but it does mean being realistic about what you have to work with. To keep things moving, setting up an efficient content creation workflow right from the start is absolutely essential.
Your pre-production checklist needs a gear list and a budget.
Basic Gear Checklist:
Remember, your budget is more than just hardware. You have to account for software (editing programs, screen recorders), any assets you might need (music licenses, stock video), and most importantly, the time your team is investing.
This kind of detailed planning mirrors what's needed for any large project; in fact, there’s a lot to learn from our guide on https://groupos.com/blog/event-management-planning. Having this foresight prevents last-minute scrambles and keeps your project from spiraling out of control. When you nail these pre-production steps, you’re not just hoping for a good outcome—you’re planning for it.
At the core of any memorable training video is a script that gives the content its voice. This is your chance to turn dry learning objectives into a story that actually engages people, makes sense of tricky subjects, and ensures the lesson sticks. I’ve seen it time and again: without a solid script, even a video with high production value will fall flat.
A lot of people freeze up when they hear the word "script," thinking it has to be some formal, Hollywood-style document. The truth is, it can be anything from a few bullet points on a notepad to a full-blown audio/visual (A/V) script. The only thing that matters is picking a format that helps you and your team get the job done.
The right scripting format really depends on how complex your topic is and your own personal style. There's no single "correct" way, but here are the main approaches I rely on when I'm in the thick of a training video creation project.
Honestly, for most internal training, I've found a hybrid approach works best. We’ll script the critical, technical parts word-for-word but leave the intro and transitions more open for a conversational feel. It’s the perfect balance of structure and authenticity.
A script isn't just about the words; it’s a blueprint for the entire viewing experience. It forces you to think visually and ensures every second of screen time has a clear purpose.
Once you've got your script nailed down, it's time to create a storyboard. This is where you bring the words to life visually, almost like a comic book version of your video. And don't worry, you don't need to be an artist—stick figures and rough sketches work just fine.
A storyboard is invaluable for a few key reasons:
For instance, if your script says, "First, navigate to the dashboard and click the 'New Project' button," your storyboard would have a simple sketch of a cursor clicking that exact button. This tiny step gets everyone on the same page and cuts out a ton of guesswork later on. For those building out a full curriculum, this level of planning can lead to formal credentials; you can learn more about this in our guide on how to create a certification program.
The best training scripts I've ever worked on all follow one simple rule: break complex information into small, digestible chunks. This strategy, often called microlearning, is incredibly effective. Let's be real—people have short attention spans and prefer content that gets straight to the point.
And it’s not just a gut feeling. Research shows that microlearning can boost learner engagement by up to 80% and improve knowledge retention by as much as 70%. Why? Because shorter videos are less daunting and far easier for our brains to process and remember.
To apply this, just look for natural breaks in your content. Could that 10-minute tutorial be split into three separate 3-minute videos? Each one can tackle a single task, building on the last. This modular approach doesn't just help your team learn better; it also creates a library of searchable, reusable training assets right inside your GroupOS platform. It's a small shift in thinking that makes your entire training program more effective and easier to manage in the long run.
Alright, with your script and storyboard locked in, it's time for the fun part: production. This is where all that planning pays off and your ideas start turning into actual video. Whether you're a one-person show or working with a small crew, having a solid recording plan is the secret to a smooth, professional shoot.
A lot of people get hung up on production, thinking they need a massive budget and a Hollywood studio. The truth? A few smart techniques can make your videos look amazing without spending a fortune. It really boils down to two things: lighting and audio. Get these right, and you're 90% of the way there.
You don't need a crazy-expensive setup to get good lighting. The industry-standard three-point lighting setup works wonders because it adds depth and gets rid of those distracting, harsh shadows.
Honestly, even a simple ring light can make a huge difference. The goal is just to create a clean, well-lit image that feels professional.
Now for the audio. This is non-negotiable. People will forgive a slightly grainy video, but they will click away instantly if the audio is buzzing, echoing, or muffled. In a training video, clarity is everything. Do yourself a favor and invest in a decent external microphone. A good USB mic for your desk or a lavalier mic you can clip to your shirt will be a massive step up from your computer's built-in mic.
How should you actually record your video? The best training programs I’ve seen usually mix and match different styles to keep things interesting.
Don't be afraid to combine these. For instance, you could start a software tutorial with a quick live-action intro, jump into a screen recording for the main walkthrough, and use animated text overlays to highlight shortcuts. This variety keeps learners engaged and helps the information stick.
"A great recording day is just the final step of great planning. Your script is the roadmap, your storyboard is the GPS, and your gear is the car. Trust the prep work you've already done."
Getting in front of a camera can feel awkward—that’s totally normal. The trick is to stop thinking of it as a "performance" and start thinking of it as "communicating." Just pretend you're explaining something to a friend or coworker.
Here are a few things that help me and the people I work with:
Once you’ve got these production basics down, you’ll have high-quality footage that makes the editing process a breeze. If you want to dig even deeper, check out this comprehensive guide on creating training videos. With your raw footage in the bag, you’re ready to piece it all together into a polished, effective training video.
You’ve wrapped the shoot and have a hard drive full of raw footage. Great job. Now, the real magic happens. This is the post-production stage, where we take all those individual clips and stitch them together into a polished, professional training video that actually gets the job done.
This isn’t just about snipping out the "ums" and "ahs." Editing is where you shape the story, pace the learning, and ensure your message lands with crystal clarity. All that hard work in planning and scripting was for this moment, giving you the best possible ingredients to work with.
Before you even launch your editing software, let’s talk organization. Trust me on this one—a messy project folder is a one-way ticket to a massive headache. Spending five minutes setting up a clean folder structure will save you hours of searching for that one specific file later.
I always use a simple, repeatable structure for every single video project:
It’s a simple system, but it means you’ll never lose your creative flow because you can't find a file.
Editing is all about layers. You start with the big picture and gradually drill down into the details. The first step is creating what’s called a rough cut. The goal here is just to get the story's skeleton in place. You'll lay your primary clips (A-roll) on the timeline in the right order, chopping off the unwanted bits at the beginning and end. Don’t obsess over perfection; just focus on getting the basic flow down.
With the core narrative in place, you can start flesh it out. This is where you’ll sprinkle in your B-roll footage to visually support what's being said. For instance, if the narrator is explaining how to "file an expense report," you can cut away to a screen recording showing exactly that. This technique keeps viewers locked in and makes abstract concepts much easier to grasp.
Post-production isn't a technical checklist; it's the final act of storytelling. Every cut, graphic, and sound choice should be intentional, guiding the learner and making the content easier to understand.
Once the video sequence feels right, it’s time to add the elements that boost clarity and professionalism. On-screen text and graphics are incredibly powerful for this. You can use them to:
Next up is the audio. The absolute priority is making sure the speaker’s voice is clean, clear, and consistent. Any background music needs to know its place—it’s there for subtle mood and energy, not to steal the show. I usually set music levels just low enough that they sit comfortably under the dialogue without ever being a distraction.
Before you export, take a moment for color correction. You don't need to be a Hollywood colorist. Most editing tools have simple sliders to adjust brightness, contrast, and saturation. A few quick tweaks can make your footage look consistent and vibrant, giving it that final professional sheen. It’s these small details that turn a simple recording into a high-impact training asset for your GroupOS platform.
Picking the right software can feel overwhelming, but it really comes down to your budget, your experience level, and what you need to accomplish. A beginner doesn't need the complexity of a Hollywood-grade program, and a pro will quickly get frustrated by the limitations of a free tool.
To help you decide, here’s a quick breakdown of some of the most popular options out there:
Ultimately, the best tool is the one that you feel comfortable with and that allows you to work efficiently. Most of these offer free trials, so don't be afraid to download a couple and see which one clicks for you before committing.
You’ve poured your heart and soul into creating an amazing training video. So, what’s next? The best video in the world won't matter if no one sees it. Getting your content in front of the right people is where the real work—and the real payoff—begins.
This isn’t just about uploading a file somewhere. It’s a thoughtful process of hosting, promoting, and measuring your video to make sure it genuinely helps your team grow.
First things first, you need to decide where your video will live. Sure, you could toss it up on YouTube or Vimeo, but for internal training, that’s often a mistake. Housing your content in a dedicated, branded platform like GroupOS gives you complete control.
This creates a secure, centralized library where your team knows exactly where to find what they need. It keeps everything organized, reinforces your brand, and makes the whole learning process feel seamless.
Once your video is hosted, you have to think like a search engine. How are people actually going to look for this information? Use clear, descriptive titles that get straight to the point.
The description is just as important. Think of it as a mini-summary that tells viewers what they’ll learn and why it's worth their time. Adding relevant tags or categories within your platform is another simple trick that helps keep your growing content library neat and tidy, ensuring your training video creation efforts don't go to waste.
Your video's title and description are its digital handshake. They should be clear, concise, and promise a solution to a specific problem, compelling your audience to click and learn.
Don't just hit "publish" and walk away. You have to actively let people know your new video is available. A quick announcement through your internal comms channels—like Slack or email—can make a huge difference. Be sure to mention who the training is for and why it’s so important.
For some creative ways to get the word out, check out our guide on effective event promotion ideas. The principles are surprisingly similar.
Finally, dive into the analytics. Metrics like view duration and completion rates tell you the real story. If you see a huge drop-off at a certain point, that’s a red flag; maybe that section was confusing or dragged on too long. This data is gold. It gives you clear, actionable insights to improve your current videos and nail the next one.
This feedback loop is what separates good training from great training, especially as video becomes more essential. In fact, by 2025, it's expected that around 89% of companies will rely on video for their core training and marketing. You can discover more insights about 2025 video marketing statistics to see just how critical this medium has become.
Even the most seasoned pros run into questions when creating training videos. It's just part of the process. Let's tackle some of the most common ones I hear, so you can keep your project moving forward without a hitch.
This is probably the number one question I get asked, and my answer is always the same: keep it short. Seriously, as short as you possibly can while still getting the point across.
We know from research that viewer engagement takes a nosedive after about six minutes. So, the sweet spot you're aiming for is 2-6 minutes. Break down complex topics into a series of shorter videos, with each one focused on a single, clear objective. This makes the content much more digestible and effective for your learners.
Absolutely not. In fact, sometimes a super-polished, high-budget video can feel a bit impersonal. What people really care about is authenticity and, most importantly, clarity.
Your budget is better spent on two things that make a massive difference: crystal-clear audio and good lighting. A decent USB microphone and a simple ring light will improve your video's quality far more than an expensive camera ever will.
It's a common fear, but the answer is no, you don't always have to be on camera. While showing your face can definitely help build a connection with your audience, it isn't a requirement for an effective training video.
For things like software demos or process walkthroughs, a clean screen recording with a strong, clear voice-over is often the best way to go. It keeps the focus entirely on the steps you're teaching.
Artificial intelligence is no longer just a buzzword; it's a genuinely useful tool that can shave hours off your production time.
Think of it as your digital assistant. AI can help you:
Using these tools lets you spend less time on tedious technical tasks and more time perfecting your actual content. For more deep dives and practical tips on making videos, check out resources like theclipbot blog.
Ready to bring your training videos together in one professional, easy-to-use platform? GroupOS gives you a central hub for all your courses, tutorials, and on-demand content. It's the perfect way to build a powerful and branded knowledge base for your community.
See how GroupOS can take your training program to the next level.