June 23, 2026

You open the box, peel off the tape, lift out the printer, and feel that rush. By tonight, you think, I'll print brackets, gifts, miniatures, maybe a replacement part for that broken drawer.
Then the situation unfolds.
The printer asks for leveling. The slicer throws unfamiliar settings at you. Your first file looks fine on screen but turns into a stringy mess on the build plate. You hear words like STL, supports, retraction, infill, wall thickness, and you realize 3D printing has a learning curve that nobody mentioned on the product page.
That's where the idea of a 3D Printer Academy becomes useful.
Not one single website. Not one official school. A 3D printer academy is the structured path between “I bought a printer” and “I know how to make this machine do useful work.” Sometimes that path looks like a formal training platform with quizzes and certificates. Sometimes it looks like a blog, a YouTube channel, a makerspace workshop, or a curriculum inside a school or association.
For a solo learner, an academy helps you stop guessing. For an organization, it offers something bigger: a repeatable way to teach members, staff, or event attendees the same core skills in the same order.
A newcomer usually starts with the wrong first question. They ask, “What should I print first?” The better question is, “What do I need to understand so my first prints don't fail for avoidable reasons?”
I've watched this happen in makerspaces and community workshops for years. Someone brings in a brand-new desktop FDM printer, downloads a model, slices it with default settings, and expects a finished object in an hour or two. When the first attempt warps, detaches, or clogs, they assume the machine is unreliable. Often, the primary problem is that nobody taught them the workflow.
A simple cable clip can expose half the beginner mistakes in one session. If the model is scaled wrong, it won't fit. If supports are placed carelessly, cleanup becomes harder than the print itself. If bed leveling is off, the first layer fails before the print even begins.
Most failed beginner prints aren't caused by a bad idea. They're caused by a missing step.
That's why the academy mindset matters. It turns random trial and error into a sequence. Learn how the printer moves. Learn what a slicer does. Learn how to read a model before you print it. Then start making parts you care about.
Once you see 3D printing education as a progression instead of a pile of tutorials, the whole field gets less intimidating.
A modern 3D Printer Academy is less like a single course and more like a workshop with clear stations. One station teaches the machine. Another teaches design choices. Another helps people troubleshoot, share results, and build confidence through repetition.
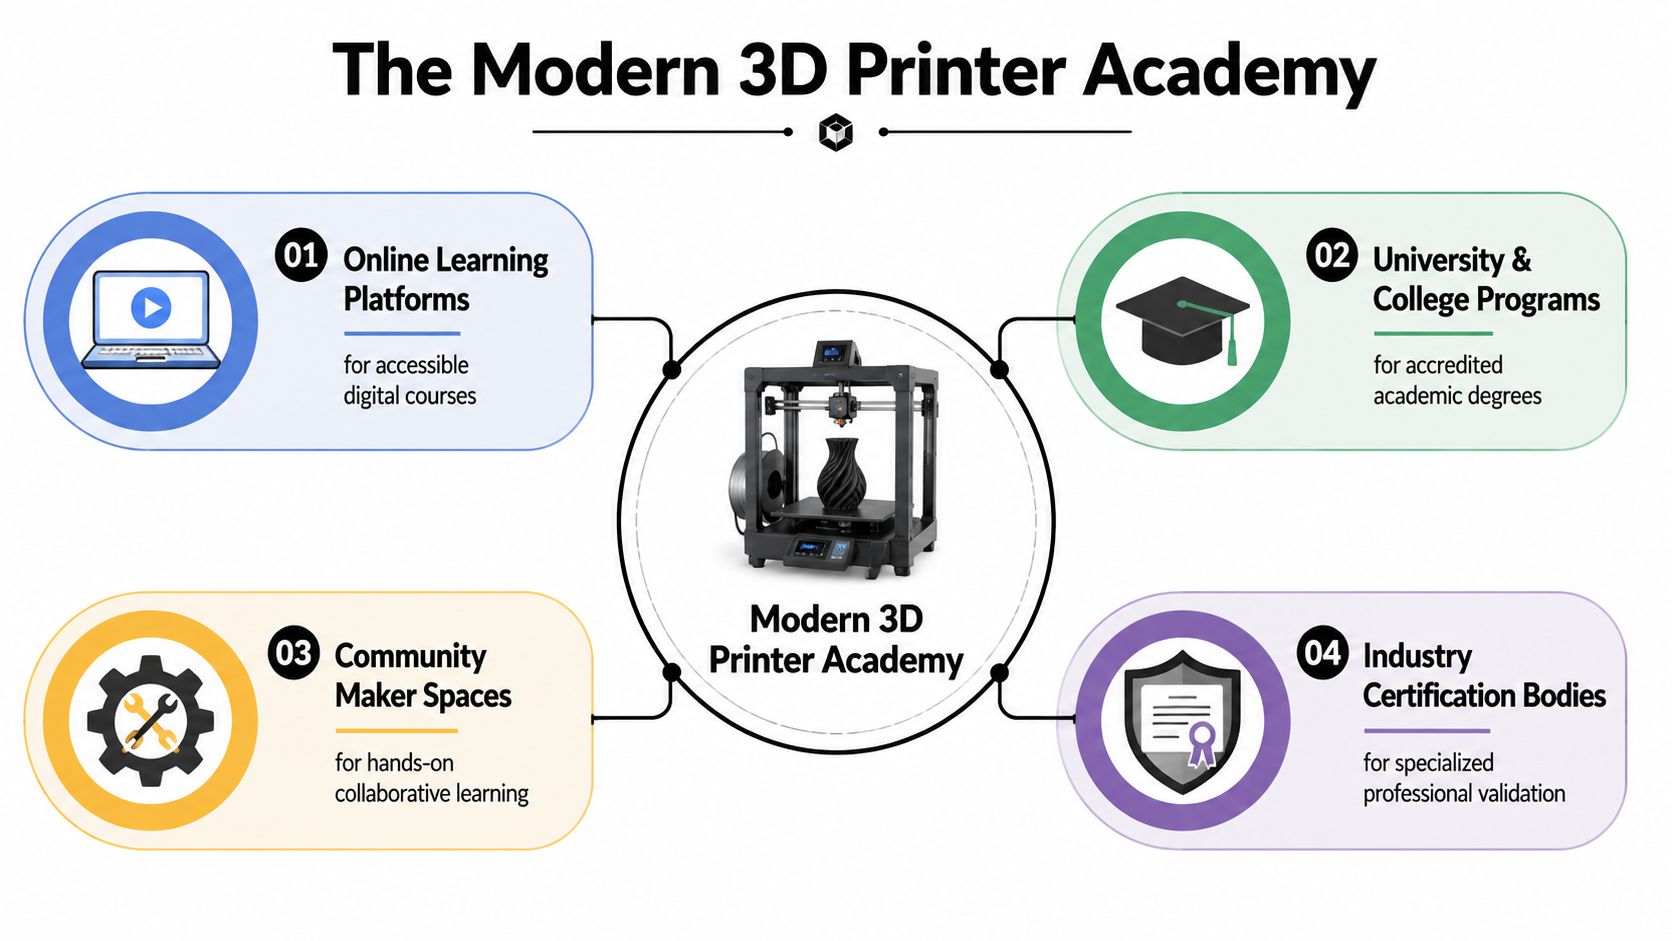
That distinction matters because “academy” can describe very different learning environments. Some programs are built by hardware companies and focus on helping buyers use a specific machine well. Others are independent teaching brands that publish tutorials for desktop makers. You will also find makerspaces, school labs, and member communities that combine lessons with peer support.
One model comes from manufacturer-led training. Sinterit's 3D Printing Academy is a free online training and certification program built around industrial SLS printing. Sinterit describes it as a structured path encompassing theory, materials, design, post-processing, and separate learning tracks for business and engineering audiences. The same academy reference notes its launch timeline, global participation, course completions, and certificate volume.
That kind of academy works well when the learner's goal is clear. A company buys a machine, needs operators to get consistent results, and wants a common training standard. In that setting, the academy functions like a shop manual plus a classroom. It reduces guesswork and shortens the distance between purchase and competent use.
A different model serves hobbyists, teachers, and small product teams. 3D Printer Academy's social media overview presents an education brand centered on desktop FDM learning, with a large public library of videos and an established audience across its channel and content catalog.
This style of academy feels more like a reference shelf in a makerspace. You do not always follow a strict sequence. You look up bed adhesion one day, PETG settings the next, and support cleanup after that. It is flexible, but it can also leave gaps if no one helps the learner connect isolated tips into a real progression.
The best modern academies do more than publish lessons. They organize learning so people can tell where they are, what to practice next, and how to ask for help when a print fails for reasons they cannot yet see.
A useful way to sort the options is by purpose:
That last category is where the idea gets bigger than individual learning. An academy is not only a path for one maker trying to improve print quality. It can also be a framework an organization builds for its members, customers, or staff. A good community team can turn scattered tutorials into courses, office hours, project feedback, and certifications that live together on a membership platform designed for community learning programs.
In other words, a modern 3D printer academy teaches skills and builds a learning culture. That is what makes it useful to both the person printing a first bracket and the organization creating a repeatable education experience for hundreds of learners.
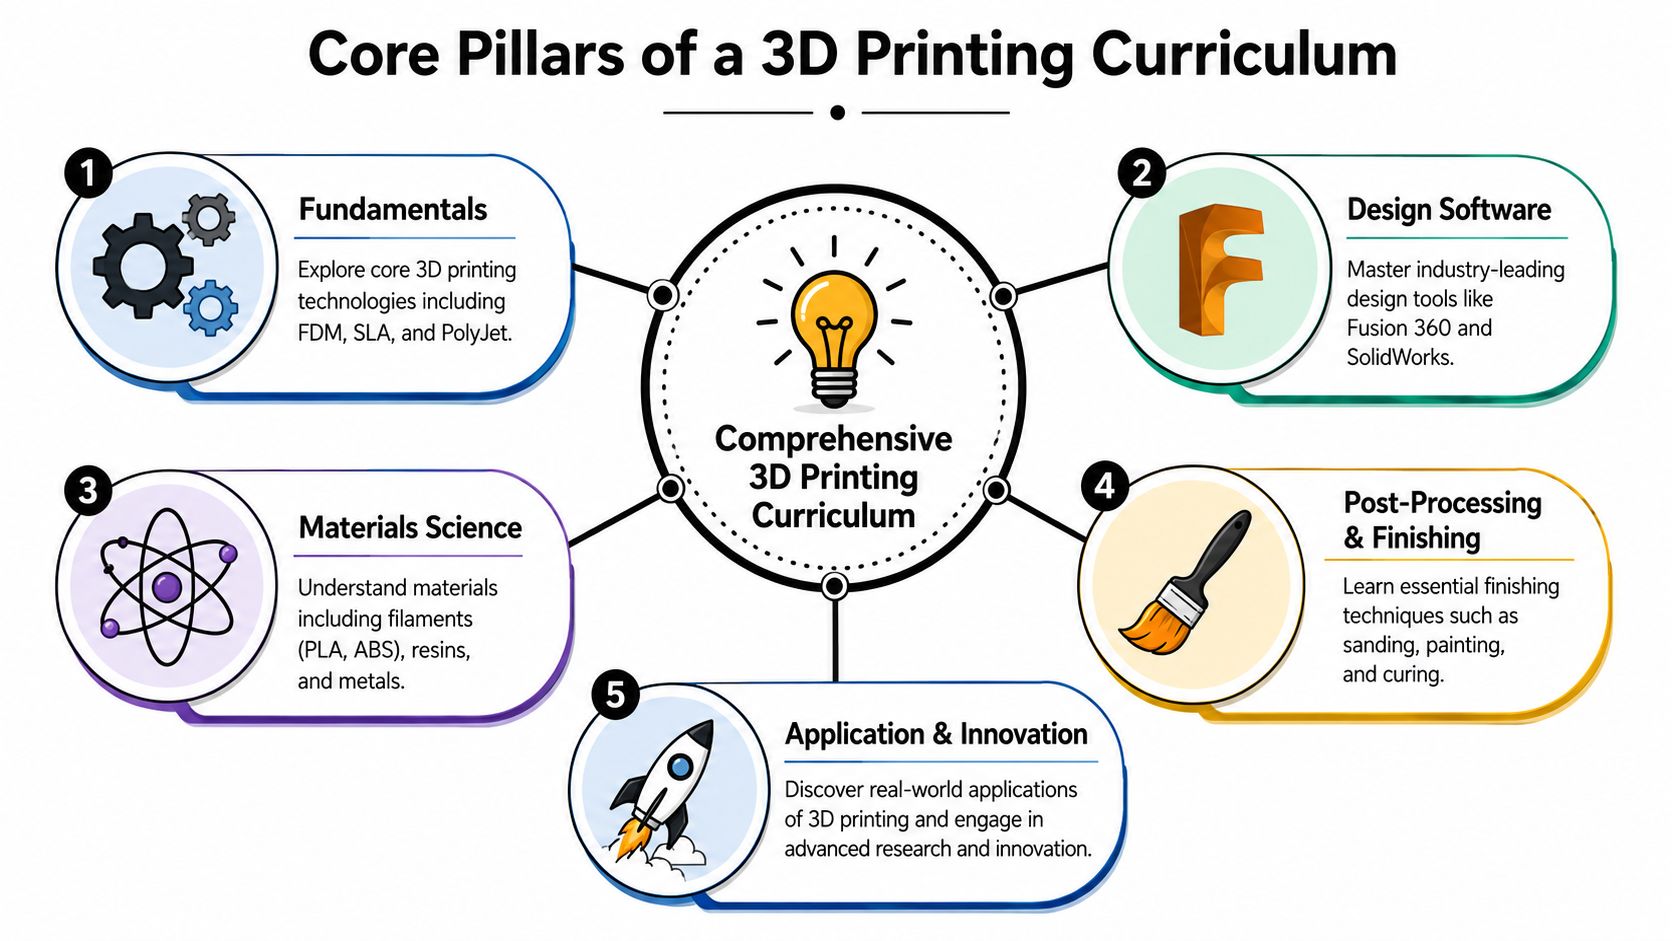
A good 3D printing curriculum works like a shop class for the digital age. It should show learners how an idea becomes a physical part, where things usually go wrong, and which skills belong together instead of being taught as isolated tricks.
Cooking is a useful comparison here. Ingredients matter, tools matter, timing matters, and technique matters. 3D printing follows the same pattern. A printer on a desk does not create skill on its own.
Learners need a mental map before they start memorizing slicer settings. FDM usually comes first because it is common on desktop machines. SLA adds resin handling, curing, and a different standard of cleanliness. SLS becomes relevant later for people entering production, engineering, or industrial prototyping.
Without that foundation, beginners often copy settings from a video and hope for the best. The knowledge breaks the moment they change printers, swap materials, or try a part with different geometry.
This first layer of the curriculum should answer simple questions clearly. What does each printing process do well? What are its tradeoffs? What safety habits belong to each one?
Many newcomers assume CAD skill automatically translates into printable parts. It does not.
A model can look perfect on screen and still fail in the physical world because of weak wall thickness, unsupported overhangs, poor orientation, non-manifold geometry, or scale mistakes. That is why file preparation should be treated as a core subject, not a side lesson.
As noted earlier, independent educational programs often focus on beginner and intermediate workflows like slicing, STL preparation, and setup rather than selling a specific machine. That approach helps learners build transferable habits. It also helps organizations building their own academy because they can teach standards that work across many printers, members, and classroom settings.
Practical rule: If learners cannot inspect a model before slicing it, they are not ready for reliable printing yet.
A stronger curriculum teaches students to export correctly, check units, inspect geometry, choose orientation with intent, and predict where supports will be needed before they click “slice.” For community managers and educators, this is also where curriculum design starts to matter. A documented training curriculum development process helps you teach design decisions in a sequence that builds judgment instead of confusion.
Here's a visual primer that works well alongside hands-on practice:
The slicer is where ideas become machine behavior. Learners see dozens of controls before they understand which ones matter most, so this part of the curriculum should narrow the field and explain cause and effect.
Start with the settings that change outcomes in obvious ways, then build from there:
This is also where good instruction slows down and lets learners test one change at a time. That habit matters for individuals learning at home, and it matters even more for organizations. If an academy teaches a repeatable testing method, mentors can diagnose problems faster and learners can compare results using a shared language.
Material choice is part of design, not decoration. PLA is forgiving for early practice. Tougher or more heat-resistant materials introduce new tradeoffs. Resin adds washing, curing, ventilation, and handling routines. Powder-based methods bring different safety and finishing expectations.
A strong course also keeps going after the print comes off the bed. Cleanup, sanding, fit checks, assembly, painting, and revision are part of the actual workflow. That final stretch is where learners stop seeing prints as isolated demos and start treating them as prototypes, tools, gifts, fixtures, or products.
For a single learner, that creates confidence. For an organization building its own academy on a platform like GroupOS, it creates a blueprint. You are no longer teaching random tips. You are teaching a repeatable process that a community can share, improve, and pass on.
Learning 3D printing gets easier when you stop treating it like one giant skill. It's more manageable as stages. Each stage has a different goal, a different kind of project, and a different definition of success.
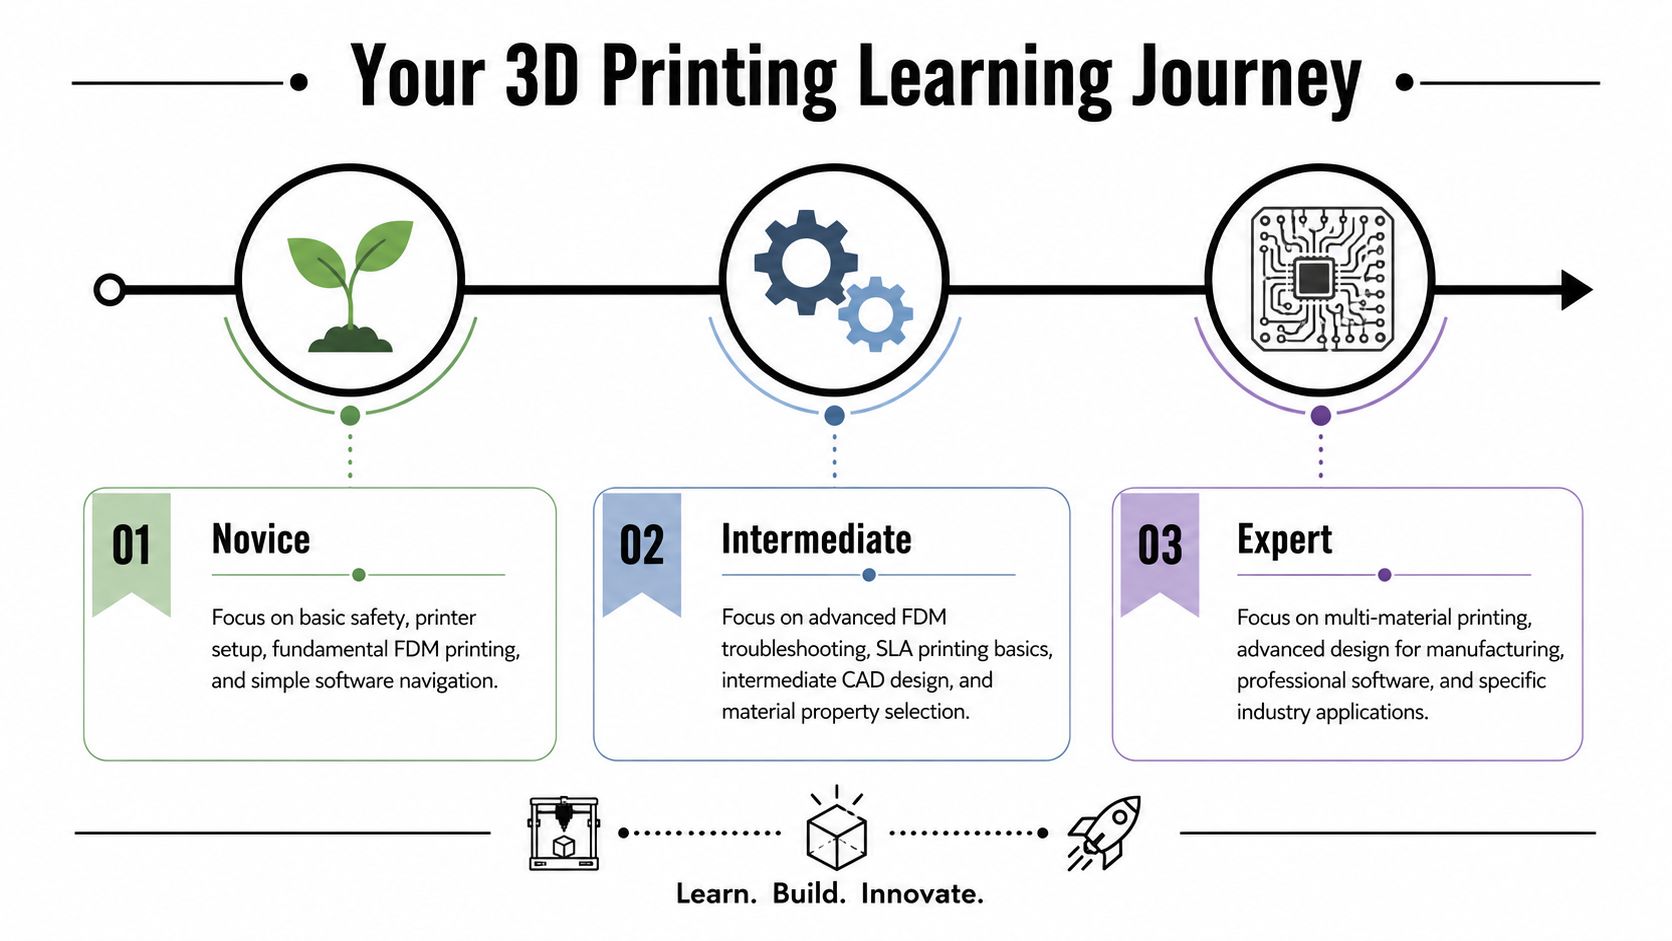
At the beginning, your job isn't to print something impressive. Your job is to build a routine.
You should be able to load filament, check the bed, slice a simple file, and recognize whether the first layer looks healthy. Projects at this stage should be fast and forgiving. Calibration pieces, a Benchy, simple tags, or a small cable organizer are perfect because they reveal problems quickly.
A novice should aim to answer questions like these:
Printing becomes interesting. You stop relying on defaults and start making choices.
Now you tune for strength, speed, or appearance depending on the part. You troubleshoot stringing, warping, poor bridging, and dimension errors. You also begin designing simple custom parts instead of downloading everything from model repositories.
A good intermediate project has a real use case. A phone stand sized for your desk. A bracket that fits a particular shelf. A replacement knob. A small articulated toy that tests tolerances and movement.
When learners reach this stage, they stop asking “Will this print?” and start asking “How should I print this?”
If you're planning your own progression, a written professional development plan template can help you turn random goals into a trackable practice plan.
Advanced users work with more variables and fewer safety rails. They may print multi-part assemblies, experiment with demanding materials, refine tolerances for fit, or modify hardware and workflow for specific outcomes.
Their projects often combine design thinking with process control. A cosplay prop with hidden assembly points. A mechanical enclosure with snap fits. A custom jig for workshop use. A system of parts that must align after printing and cleanup.
At this level, expertise isn't just technical. It's diagnostic. You know whether a problem starts in the CAD model, the slicer profile, the material, or the machine.
You buy a printer, print the sample file, and then hit the first real fork in the road. One path is a pile of disconnected videos, forum threads, and trial-and-error. The other is a learning program that gives you order, feedback, and a reason for each step.
The better option depends on what you need 3D printing to do for you.
A hobbyist making parts for a home workshop can learn well with a lighter structure. A school, makerspace, library, or product team needs something different. They need a program people can repeat, teach, and support without reinventing the process for every new learner.
Choose a program the way you would choose filament for a part. PLA works for many prints, but not every print. A learning path also has to match the load it will carry.
Ask these three questions first:
Those answers shape the right format more than polished branding or a huge lesson catalog.
A large course library can look impressive and still leave beginners stuck. New makers usually need sequence, not volume. They need the right concept at the moment it becomes useful. Bed leveling before first-layer troubleshooting. Slicer settings before material experiments. Simple design edits before full CAD projects.
That is what a good 3D printing program does. It works like a shop teacher who knows which lesson to put on the bench next.
Look for signs that the program was built by people who understand how skills stack:
For organizations, there is one more test. Can the program be used by many learners without depending on one expert answering the same question all day? That matters for community managers, lab leads, and educators building an academy model. The strongest program is not only teachable. It is repeatable.
| Criterion | Free Resources (YouTube, Blogs) | Paid Programs (Courses, Certifications) |
|---|---|---|
| Learning flow | Flexible, but often fragmented | Usually structured in a clear sequence |
| Support | Community comments or forums, sometimes uneven | May include instructor guidance, peer groups, or formal feedback |
| Best use case | Hobby learning, quick troubleshooting, exploring a topic | Professional development, staff training, repeatable onboarding |
| Depth | Can be strong, but learners must organize it themselves | Often arranged around milestones and practice |
| Recognition | Usually informal | May offer certificates or completion records |
| Cost | Low barrier to start | Best when the structure or record of completion justifies the price |
Free resources are great for patching specific holes. Paid programs are often better for building a staircase.
Many learners do best with both. Use public tutorials to answer a narrow question. Use a structured program when you want a guided path, consistent feedback, or proof that someone has completed training.
Choose the program that removes guesswork and helps you keep making.
For an individual, that may mean finding a course with strong project progression and a responsive community. For an organization, it may mean building your own academy so every member starts with the same foundation, uses the same terminology, and advances through the same milestones. That shift matters. You stop collecting content and start creating a learning system.
The fun part of a 3D printer academy is that every lesson can become an object in your hand. If you choose projects carefully, each one teaches a skill without overwhelming you.
Your first projects should act like mirrors. They should reveal what the printer is doing well and what it isn't.
A calibration cube teaches scale and consistency. A Benchy shows how the machine handles curves, bridging, surface finish, and cooling. A cable clip or bag hook introduces simple functional design without demanding long print times.
The best beginner projects share three traits:
Once basic printing feels stable, switch from “fun prints” to “useful prints.” Design a phone stand that matches your exact charging cable angle. Make drawer dividers sized to your tools. Print a replacement foot for a chair or a clip for a loose panel.
These projects force you to measure, adapt dimensions, and think about strength. They also reveal the difference between a nice-looking print and a part that fits and lasts.
A small articulated toy is another strong intermediate challenge. It tests tolerances, motion, and support strategy without requiring advanced hardware.
At the advanced level, the project should push more than one skill at once. Build a multi-part assembly that screws or snaps together. Design a workshop jig around a real task. Make a detailed prop that needs orientation planning, seam hiding, cleanup, and finishing.
These are the projects that turn printing into problem-solving.
A good advanced print starts before the slicer. It starts with the question, “What must this object do?”
That's the point where an academy has done its job. You're no longer just producing objects. You're designing solutions.
Individual learners can piece together a strong education from videos, blogs, and practice. Organizations have a different challenge. They need consistency.
A professional association, event team, university lab, or internal innovation group can't rely on scattered bookmarks and a few enthusiastic volunteers. They need a learning environment that documents what members learned, what they practiced, and how they progress.

Many public 3D printing resources are strong at beginner instruction. They're less strong at organizational needs like standardization, verification, and member progression.
A healthcare or aerospace training program, for example, may need documented workflows, version control, validation steps, and audit trails. The Vizient analysis on medical 3D printing workflows highlights that many institutions still lack formal SOPs for model validation, sterilization, and change-control tracking. Public academy-style tutorials rarely address those requirements in a systematic way.
The same gap appears in member education. An association may want verifiable badges, staff certification, workshop prerequisites, and clear records showing who completed what. General tutorial platforms usually don't handle that well.
Another common weakness is that many public resources teach isolated tasks but not sustained participation. Research referenced in the ScienceDirect discussion of maker and STEM engagement points toward the importance of community-driven participation for skill retention, while public academy materials often stop at one-off tutorials.
For organizations, that matters. A real academy should support:
A dedicated white-label community platform becomes practical rather than optional. It gives educators one branded home for courses, certificates, event registration, discussion channels, and member records.
A solid program usually includes a few layers working together:
That combination turns information into a system. And systems are what organizations need if they want a 3D printer academy that lasts beyond one energetic instructor or one annual event.
If your organization wants to turn scattered tutorials, workshops, and member discussions into a cohesive academy, GroupOS gives you one place to run courses, manage events, deliver content, track engagement, and support a branded learning community. It's a practical fit for associations, conference teams, and professional groups that want 3D printing education to be structured, measurable, and easier to manage.